What Crystal Studio is for
Crystal Studio is a 3D workspace for subsurface laser engraving — the kind that suspends an image in 3D inside a glass block. You arrange meshes, text and artwork inside a virtual crystal, convert the scene into a point cloud (the cloud of tiny points an engraver turns into dots inside the glass), check how the finished piece will look as lit glass, and export a file your machine can run. New here? Start with the studios overview and what a point cloud is.
1. The workspace, and choosing your view
Crystal Studio opens on one large window with your scene in it. The wireframe box is the crystal blank, the tools down the left edge orbit, select and move objects, the panel on the right holds every setting, and Save to Cloud keeps the project.
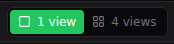
1 view or 4 views. In the top-right corner sits a pair of buttons. 1 view gives the whole screen to a single window, and it is the default because it is what most of the work wants. 4 views splits the screen into a 2×2 grid.
What the big window shows. In 1 view, a small bar floats over the top of the viewport with three choices:
- Scene — the crystal and everything you have placed inside it. This is where you build.
- Point cloud — the generated points, in an editor you can orbit and select in.
- Crystal preview — the finished piece, rendered as lit glass. See step 7.

Top, Right and Front. The second floating bar means the same thing in every view — look from this direction. In the Scene it decides which of the three cameras fills the window; in the Point cloud and the Crystal preview there is only one camera, so it swings that one round instead. Orbit with the mouse and the button releases itself, so you can always tell whether you are square-on or free-rotated. Click it again to snap back.
Switch to 4 views and the three scene cameras are on screen together — Top, Right and Front — with a fourth window for the result. That fourth window carries its own Point cloud / Crystal preview pair in its header, and starts on the crystal preview. Use the grid when you are lining an object up on three axes at once, and 1 view when you want the detail.
Every scene window and the point-cloud window can also be maximised, reset to its default camera, and switched between an orthographic and a perspective view from the small buttons in its own header.
2. Add your model
Crystal Studio works from meshes, so you start by adding one:
- Import Mesh — bring in an STL, GLB, GLTF, OBJ or PLY mesh, up to 500 MB, including one sent over from Mesh Studio. Drop the file on the dialog, paste it, or browse for it; for an OBJ with textures, include the .mtl and image files alongside it. To put a flat photo in a crystal, first make a 2D mesh of it in Mesh Studio (see the Mesh Studio walkthrough), then import that mesh here. The same dialog will open a mesh from your saved projects, or send you to Mesh Studio to build one from a photo.
- Add Text — place editable 3D text directly in the scene, with a font picker, size, depth, bevel, letter spacing and alignment. You can upload your own font file too.
- Graphics — a library of ready-made vector artwork: dividers, frames and borders, floral, heraldic, celebration, religious, memorial, animals, symbols and objects. Search it, drop a piece into the scene, then set its width, brightness, and whether it engraves as one flat tone or keeps the artwork’s own light and dark areas. You can upload your own SVG as well, up to 2 MB.
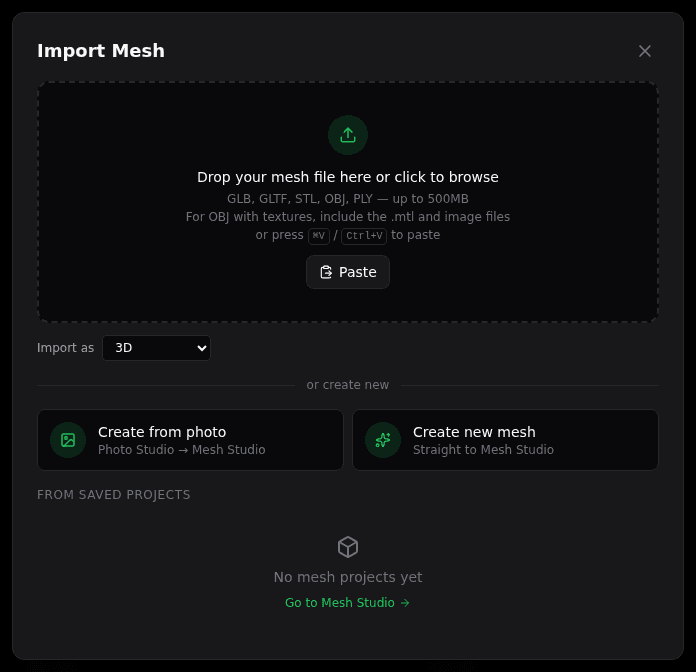
The import dialog also has an Import as selector — Auto-detect, 2D, 2.5D or 3D — which decides how a file from disk will be sampled. Leave it on Auto-detect unless you already know it will guess wrong; you can change it afterwards anyway (see step 3). A mesh opened from a saved project ignores it, because that project already knows its own type.
One thing the importer will refuse: a PLY that holds only points and no triangles. Crystal Studio takes meshes in — the point cloud is what it produces at the other end.
If you arrived here from Mesh Studio’s Send to Crystal Studio button, all of this has already happened. Your mesh is imported, fitted to the crystal, converted, and waiting for you on the crystal preview — so if the studio looks like it has skipped ahead, that is why. The Scene tab is the way back.
3. Manage objects and their properties
The Objects tab lists everything in the scene. Each row has a colour swatch, the object name, and controls to toggle visibility, lock, duplicate or delete it. Select more than one and a Group button appears at the foot of the list; a group can be collapsed, ungrouped, or moved as one thing.
Right-click a row — that is where the three crystal-fitting helpers live, and there is no other way to reach them: Center in Crystal moves the object to the middle of the blank, Resize to Crystal scales it to the available volume, and Fit in Crystal does both. They are the fastest way to get a freshly imported mesh sensibly placed before you fine-tune it.
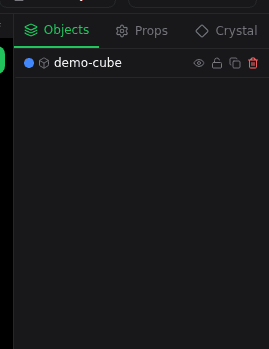
Select an object to open its Props (Properties) tab, where you place it exactly: Position (mm), Rotation (degrees), Scale, and Dimensions (mm) if you would rather type the real-world size than a scale factor. Scale and Dimensions share a link toggle — linked by default, so the object keeps its proportions; unlink it to stretch one axis. The three boxes are labelled X, Y and Z rather than width, height and depth, because an imported mesh at an arbitrary rotation has no reliable front. You can also rename the object and leave yourself Notes on it. Precise placement here is what makes the finished engraving land where you intend rather than by chance.
Select several objects and Props becomes a multi-object panel instead, headed with the number you have selected: from there you can show, hide, lock, unlock, group or delete them together, and nudge the whole selection with Offset Position, Offset Rotation and Offset Scale.
Two properties matter most for a mesh you brought over from Mesh Studio. Mesh type tells Crystal Studio how to sample the object — 2D, 2.5D or 3D. Imports are classified for you, and the note underneath says what you have (Closed solid for 3D, Open mesh otherwise), but you can correct it here if the guess is wrong.
When the mesh type is 3D, a 3D color setting appears — and which option you pick changes what the slider below it does:
- Textured 3D engraves the model’s textured front, and that is what gives the piece its contrast. The slider becomes Back & sides color and sets only the shell behind that front; the texture itself is left untouched. Keep it low — roughly 3–10% — so the back stays quiet and the textured face reads clearly.
- Flat ignores the texture and renders a uniform grey shape. Here the slider is simply Color, and it drives how densely the whole object is engraved. Around 50% or more is a sensible starting point for a flat-colour piece.
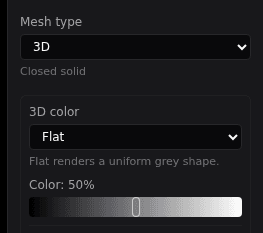
Treat those numbers as a starting point rather than a rule: this is an artistic choice, and the right value depends on your subject and the look you are after. The reason a low setting usually wins for a textured model is that engraved glass has no occlusion — the back of the object is always visible through the front, so keeping it dark is what stops it competing with the face.
Further down the panel are two per-object switches worth knowing about. Override point density lets one object be engraved more or less densely than the rest of the scene, and turning off Apply crystal-margin fade keeps an object at an even density right up to the inner margin instead of thinning towards it.
4. Shape the crystal
The Crystal tab defines the blank you are engraving into:
- Shape — Box, Heart, Cylinder, Sphere, Dome or Diamond. A diamond adds an Inner boundary choice (Prism or Cylinder), because the volume your image is allowed to fill inside a gem is a straight solid rather than a smaller gem.
- Preset — pick a standard blank size for that shape, or set your own. The list shows which preset your dimensions currently match, and reads as unset once you type a size of your own. A faceted diamond is sized by preset only; the flat-sided ones stay editable, so you can type your own diameter and thickness there.
- Dimensions (mm) — Width, Height and Depth, each box also labelled with the axis it drives so the row always reads X, Y, Z. Boxes that do not apply to a shape are disabled: a sphere asks for a single Diameter, and a cylinder for a diameter and a height.
- Margins — the border (Top, Bottom, Sides, Depth) kept clear around your image.
- Fade zone — softens the engraving near the crystal’s edges so the image falls off gently instead of stopping dead.
- Crystal and Margins switches — show or hide the crystal outline and the margin guides in the views.
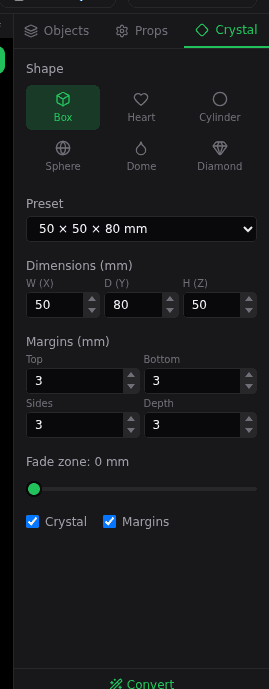
Set this to match the physical blank you are going to engrave, and set it early. Changing the crystal after a conversion does not re-sample the points — the studio will tell you the cloud is out of date, but the fix is another conversion, so it is cheaper to get the size right first.
5. Convert to a point cloud
The Convert tab turns your scene into the engraving-ready point cloud. Pick a Method at the top:
- Portrait layers — the standard conversion, and the one to use unless you have a reason not to. It stacks several depth layers per point so brightness builds up along the viewing ray: the whitest areas light every layer, which is what gives a crystal bright highlights and a dimensional read.
- Portrait layers HD — marked experimental. Same idea, but it spreads the stacked layers across a finer grid instead of repeating the same spot, so the stack carries extra detail: sharper texture and cleaner highlights at the same point count. It is the newer of the two, so compare it against Portrait layers before you commit a blank that matters.
Both offer the same controls:
- Best viewing direction — the face people will look at most: Top, Bottom, Front, Back, Left or Right. The layers stack along this direction, so choose it before you tune anything else.
- Layers — how many depth layers to stack. More gives a brighter, more dimensional read; fewer are flatter and faster.
- XY Step (mm) — in-plane point spacing. Smaller gives finer detail and more points; larger is softer and faster.
- Z Step (mm) — spacing between the stacked layers. Smaller packs them tighter; larger spreads the relief deeper.
- Tone shaping — shifts the balance between shadows and highlights. Lower flattens contrast; higher deepens shadows.
- Smooth pass — helps reduce streaky patterns. Leave it on.
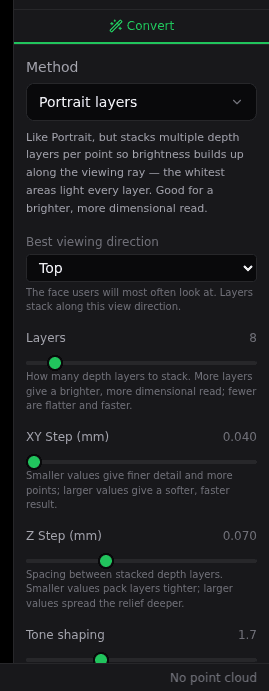
Change a control and a small reset arrow appears next to it, which puts that one setting back to its default — so experiment freely. If you open an older project that was made with the earlier single-layer Portrait method, it keeps that method and keeps working; it simply stays in the list until you pick something else.
6. Generate the point cloud
Press Convert to Point Cloud. Progress is reported as it runs and you can cancel at any point. When it finishes, the studio takes you to the crystal preview, the point count appears in the status bar, and the button becomes Update Point Cloud for every run after that.
Switch to the Point cloud view and you get an editor rather than a picture: orbit the cloud, box- or lasso-select points, move a selection, undo and redo, change the drawn point Size, thin the display with Skip so a huge cloud stays responsive, choose a Render style, and toggle the grid. It is for tidying — clipping a stray fringe of points, nudging a selection — rather than for redesigning the piece.
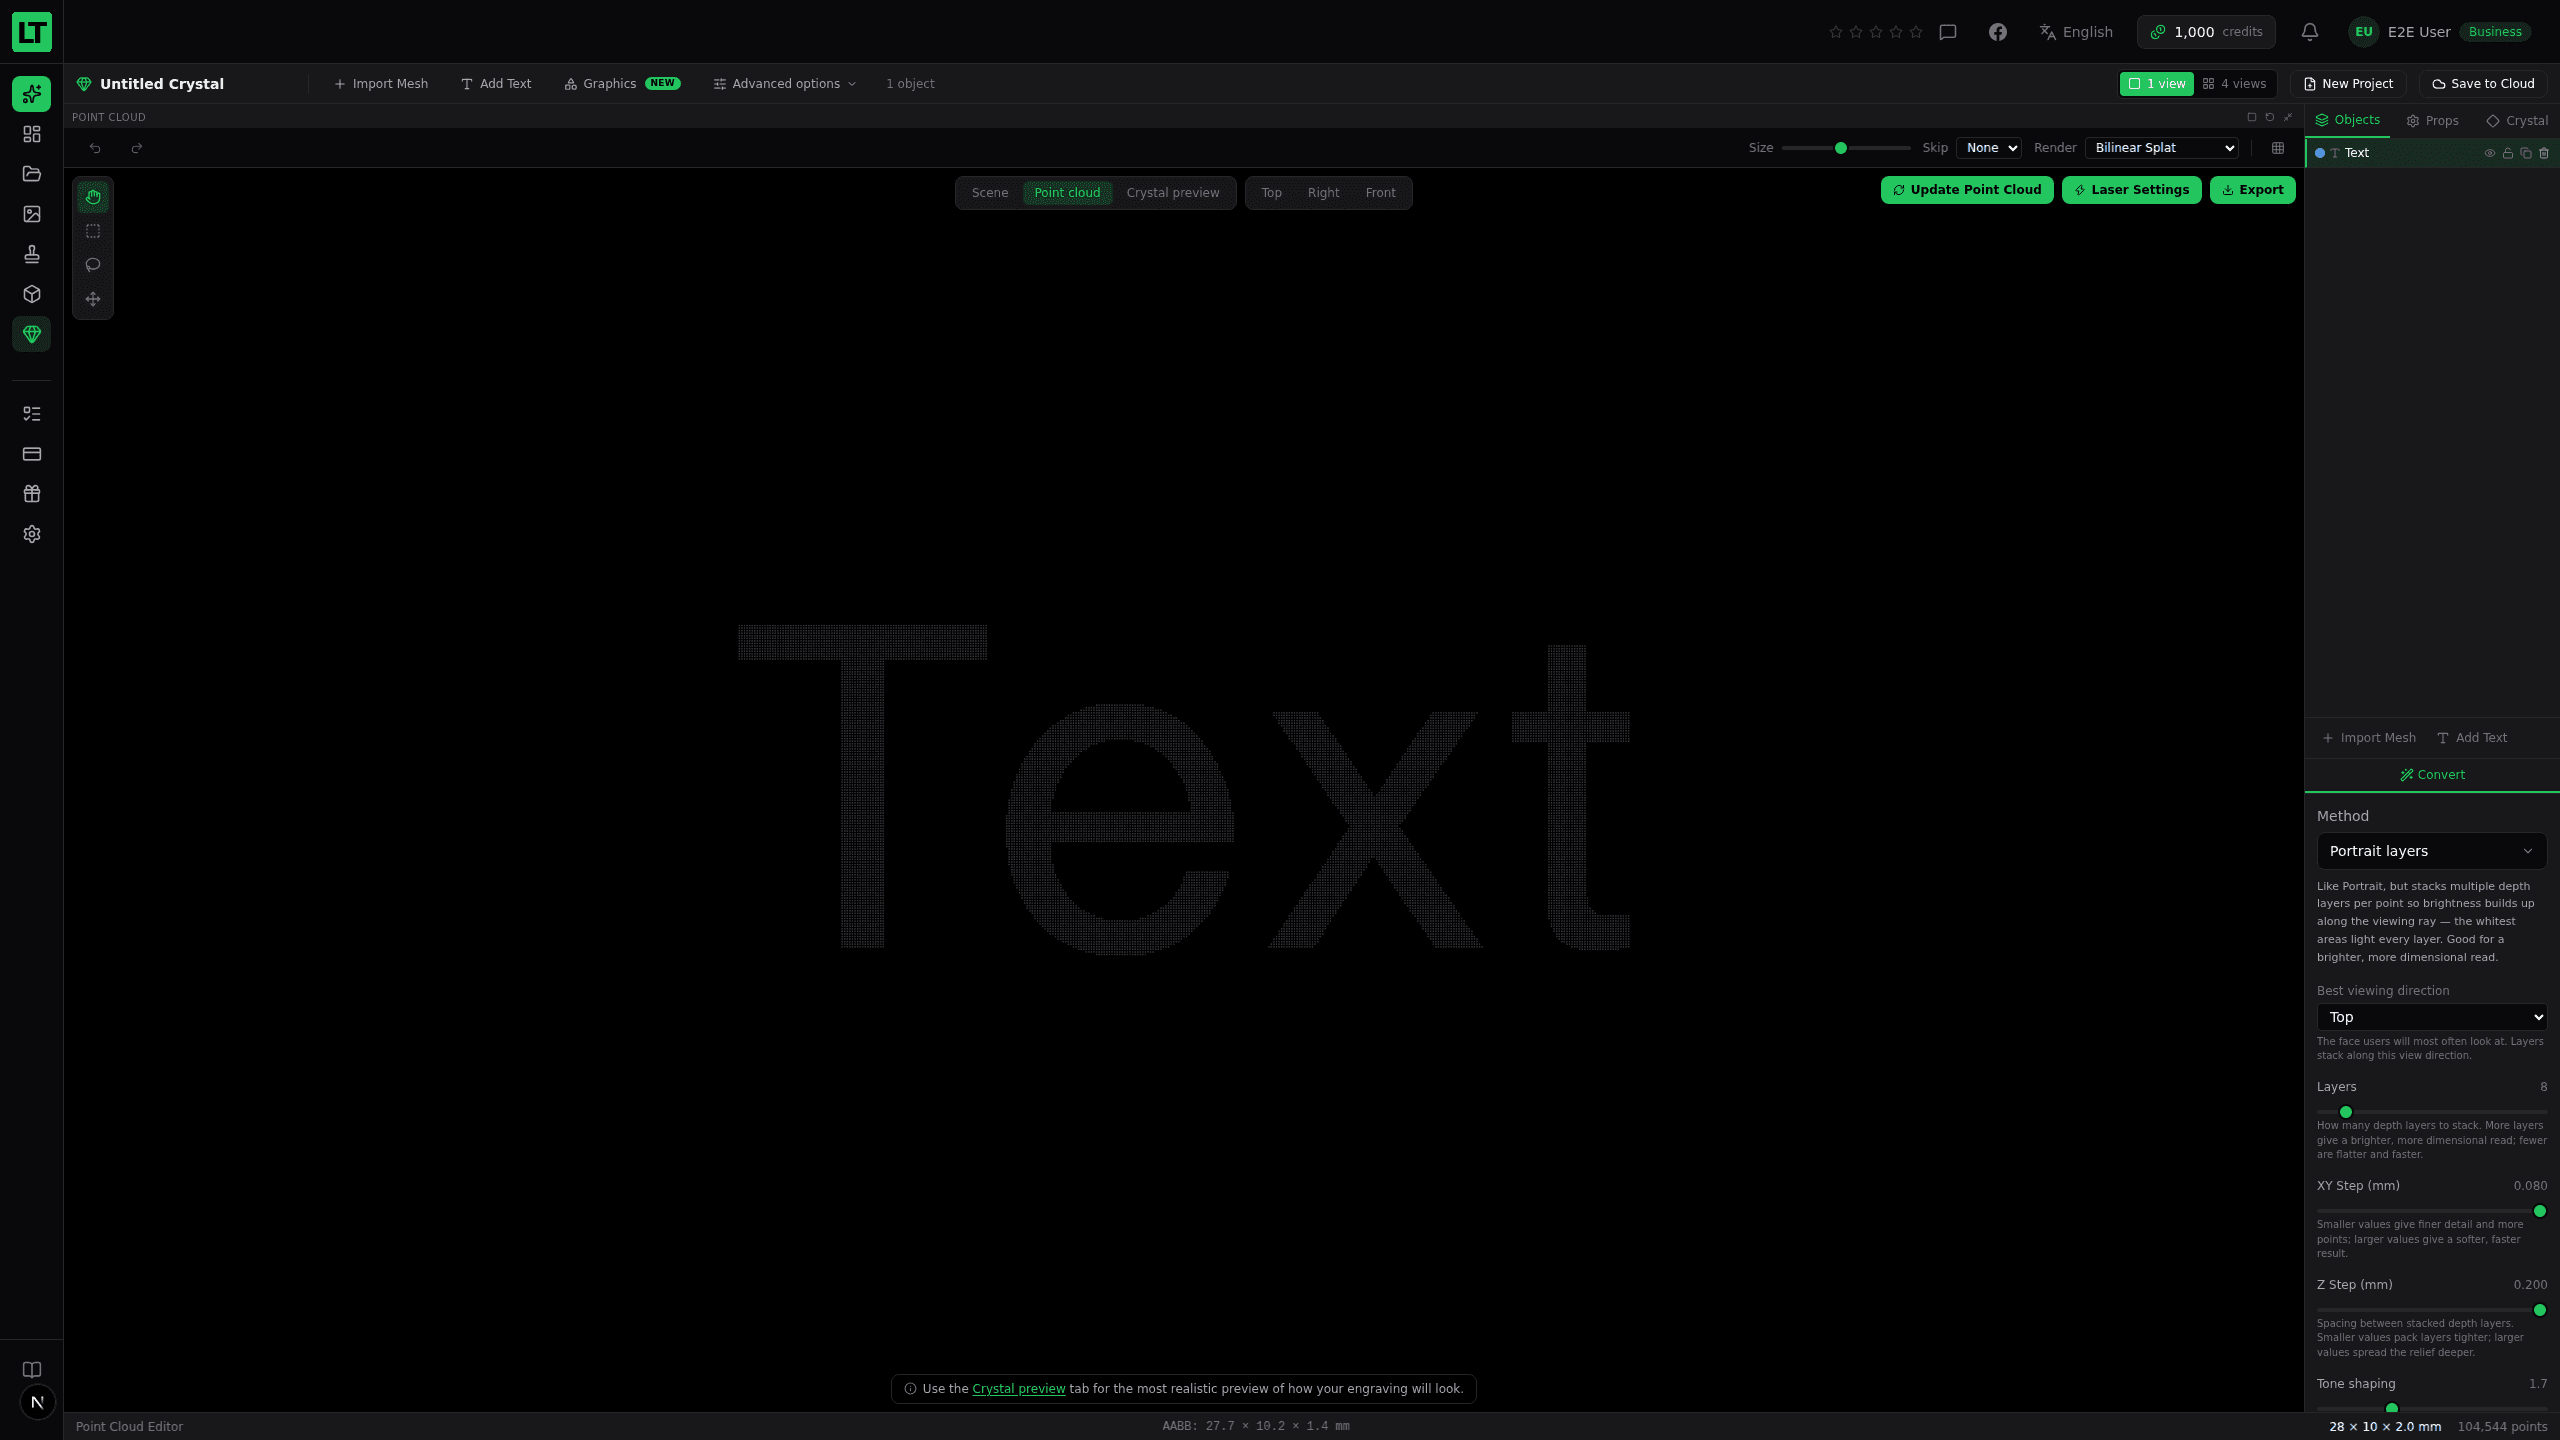
Watch for the out-of-date warning. Change anything in the scene after converting and an amber Point cloud is out of date notice appears beside the buttons. The dots on screen still describe the older version of your scene and nothing about them looks wrong, which is exactly why this one is worth acting on: press Update Point Cloud before you export.
7. See it as a finished crystal
The Crystal preview is the most useful check in the studio. Instead of dots on a dark background, it renders your engraving as it will actually look: points lit inside glass, standing on an illuminated base. It is the same view a customer sees on a shared preview link, so what you approve here is what they get.
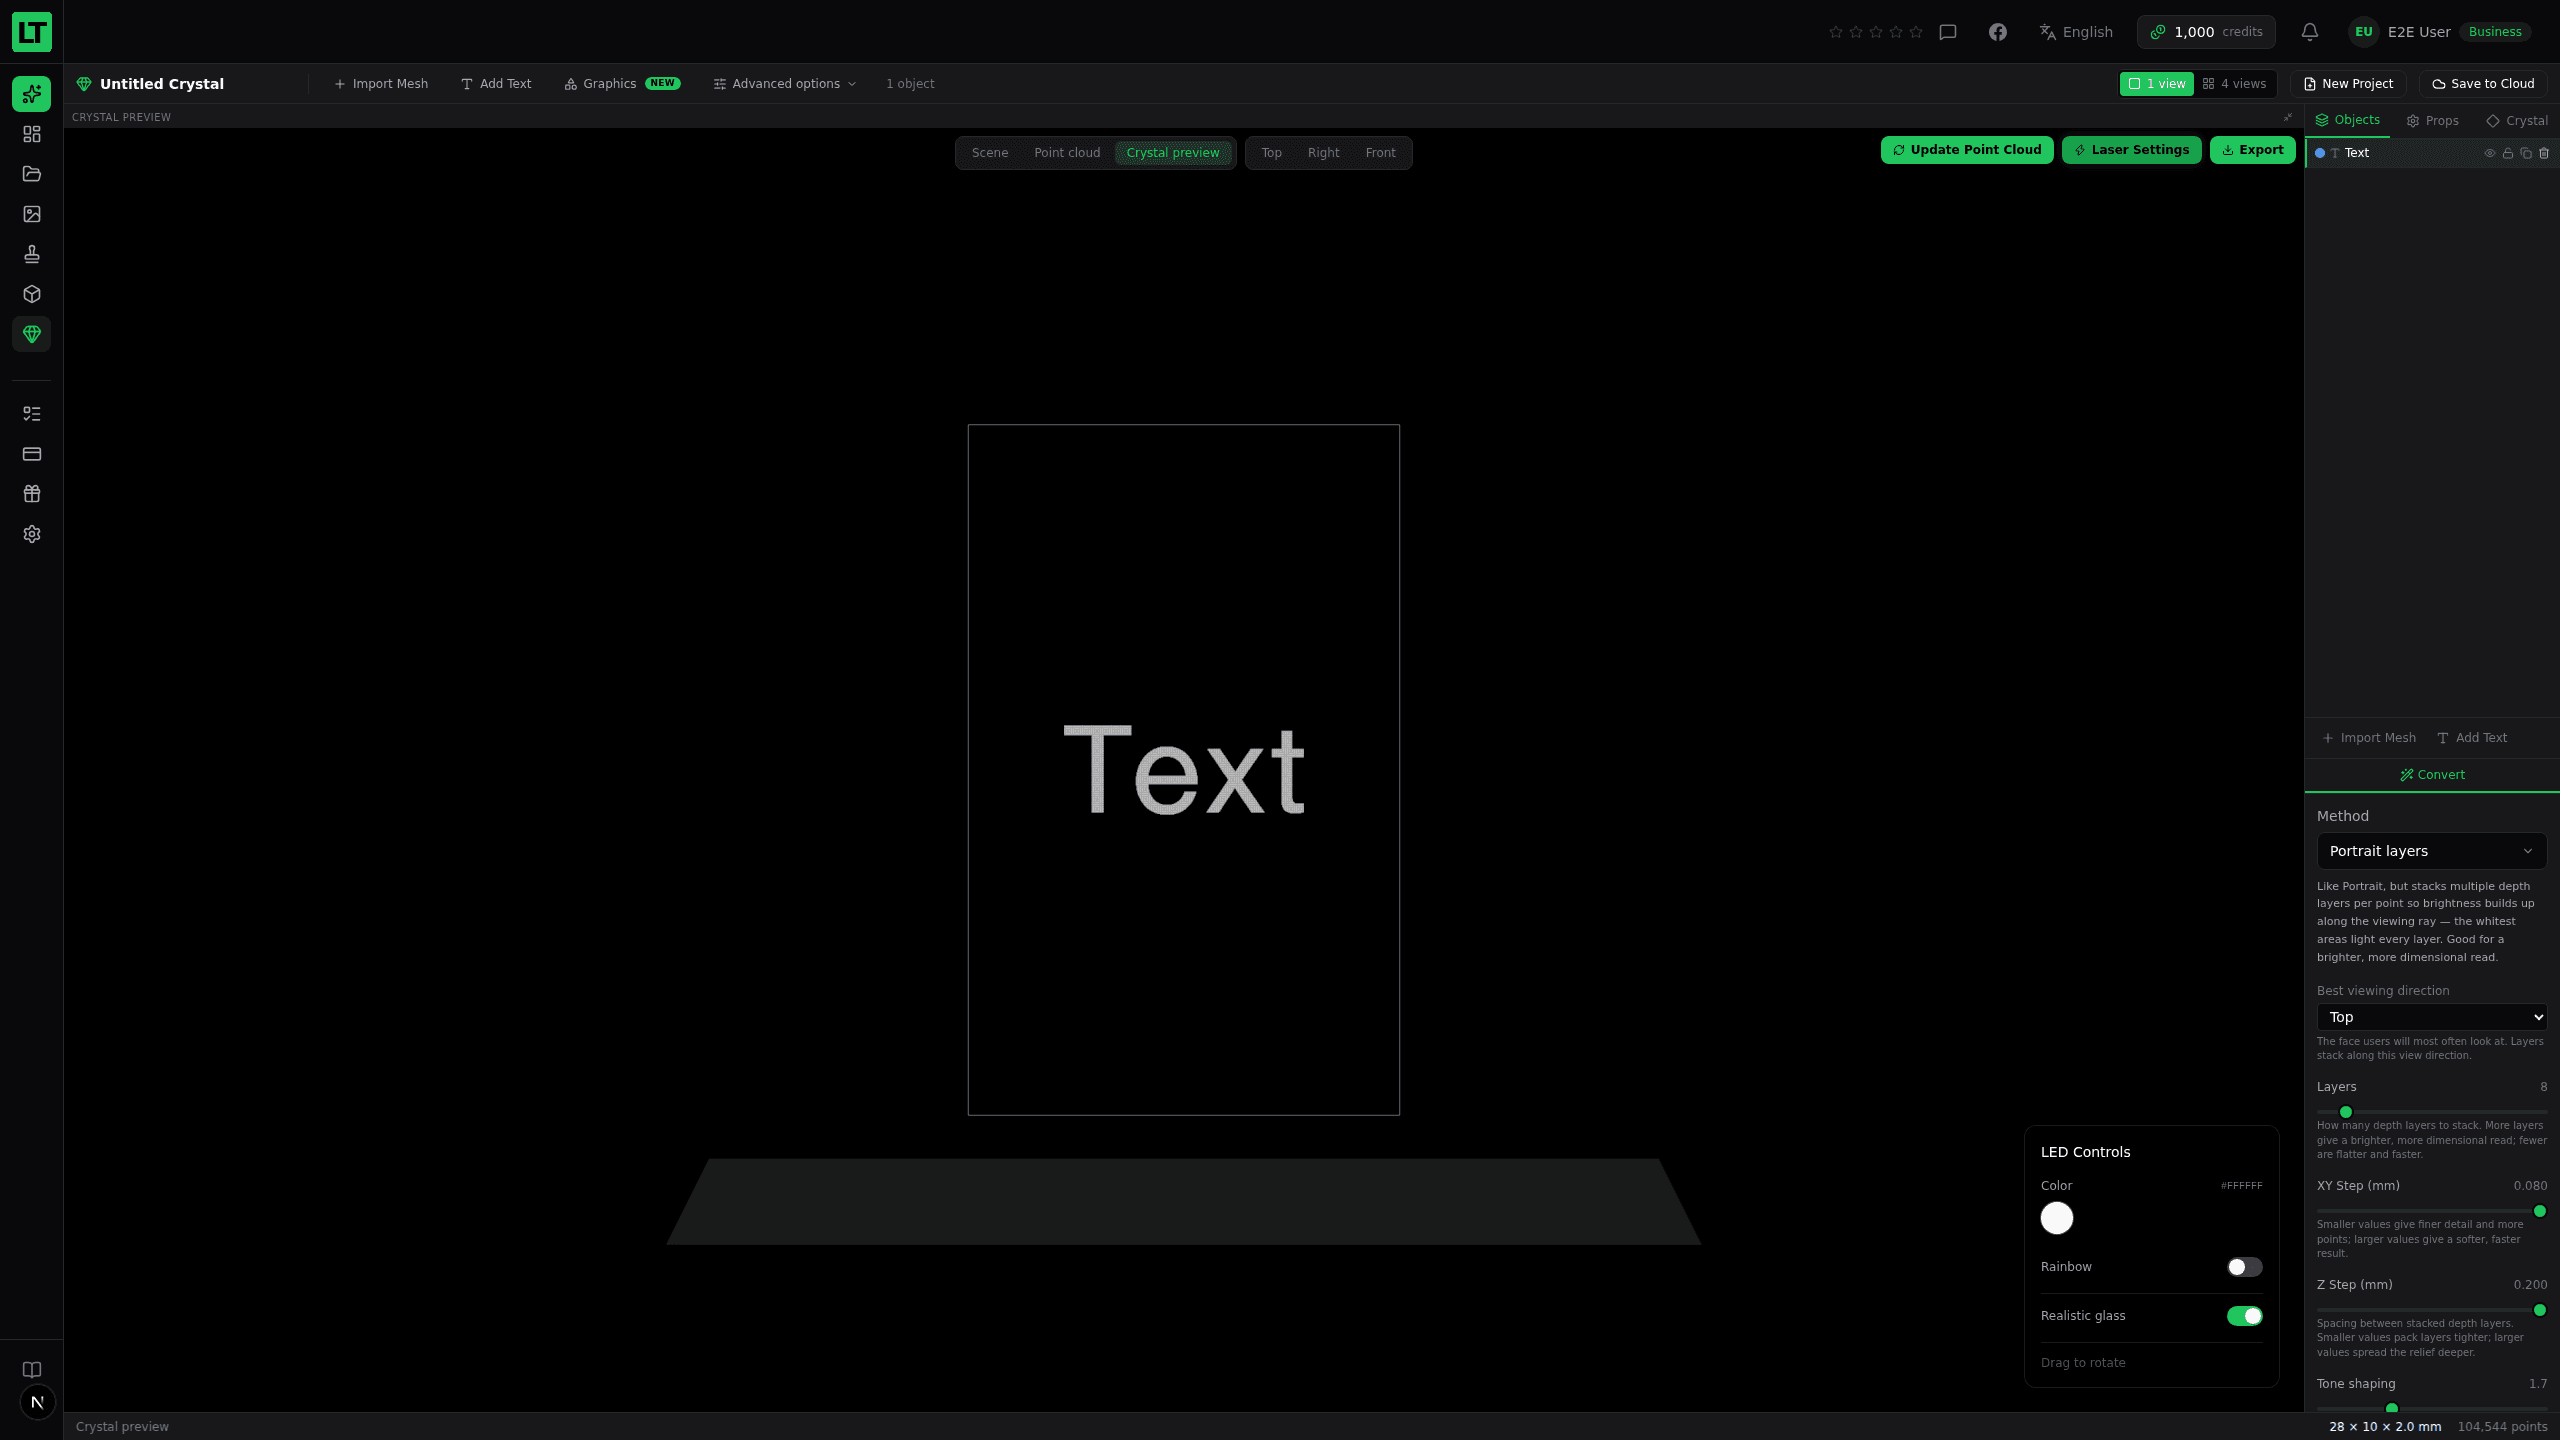
Reach it from the floating view bar in 1 view, or from the fourth window’s header in 4 views. It brings a few controls of its own:
- LED Controls — set the base Color, or switch on Rainbow to cycle through it, so you can see how the piece reads on the lit base you intend to sell or gift it on.
- Realistic glass — a heavier, more accurate render of the blank itself. Leave it on for the closest look at the finished piece.
- Drag to rotate, and use Top, Right or Front to come back to a square-on angle.
Before you have converted anything the preview says so and offers a Convert to Point Cloud button, so you can start from here rather than going back to another tab. The same Update Point Cloud, Laser Settings and Export buttons sit in its corner as in the point-cloud window — it is one cloud, and both views act on it.
Sharing a preview. Once a project is saved you get a preview link, which you can open in a new tab or copy and send to a customer. It shows exactly this crystal and its LED controls, and nothing of the editor. The link changes every time you save a project that has a point cloud in it, which means the previous link stops working. Exporting counts as a save — the studio saves the project for you after a successful export — so send the link once you are finished, not while you are still working.
8. Export the point cloud
The Export button sits in three places — the point-cloud window, the crystal preview, and the scene window once a cloud exists — and all three open the same dialog. Pick a Format and confirm. If an export carries a credit cost, the dialog shows it and your balance before you commit; and because the charge is tied to the design rather than to the file, once you have paid for one export you can take the same design in every other format for nothing. A successful export also saves the project to the cloud for you.
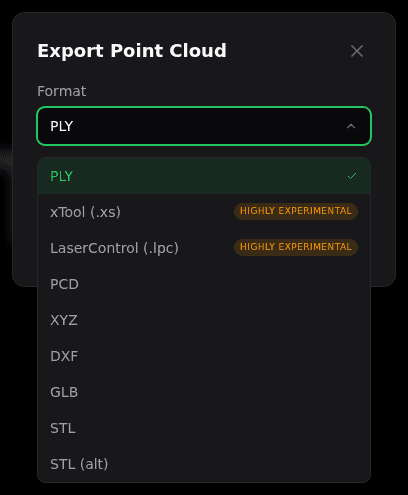
- PLY — the default, and what most subsurface engravers expect.
- xTool (.xs) — marked highly experimental. A complete job file for xTool machines rather than raw geometry, and it brings its own placement panel. See step 9.
- LaserControl (.lpc) — the other straight-to-machine format, also highly experimental. It has not been verified on hardware yet, so test it on scrap before committing a finished blank.
- PCD, XYZ and DXF — plain point and CAD formats for software that asks for them.
- GLB, STL and STL (alt) — for machines that want the dots as geometry. The two STL variants write the same thing in two slightly different ways; if your software rejects one, try the other.
Append conversion settings to filename is on by default and stamps the step sizes, tone and viewing direction into the file name, so a folder of exports still explains itself months later.
If your scene has moved on since the cloud was generated, the dialog warns you again at the point of no return and offers to regenerate first. Take it, rather than exporting points that no longer match your scene.
For the seven geometry formats the last step is the same: load the exported file into your engraving software, set your crystal size and laser settings, and run the job. The two machine formats are different in kind — they already carry the blank, the placement and the laser settings, which is exactly why they are worth testing on scrap before you trust one with a finished crystal.
9. Getting it onto the machine
Three more tools make the jump from file to finished crystal less of a guess.
Laser Settings. Next to Export is a button that reads your conversion settings back and suggests engraver settings to match — laser type, layer height, power, dot duration and frequency. They are a starting point, not a recipe: lasers vary, and so does the glass, so expect to fine-tune. It also carries the warning that matters most — do not rotate or scale the point cloud in your laser software. The orientation on the base has to match what you see in Crystal Studio exactly, or the engraving is ruined.
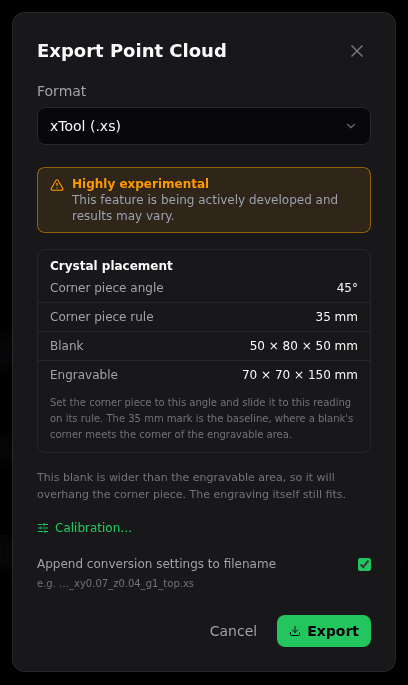
Crystal placement, for the xTool format. Choose xTool (.xs) in the export dialog and a Crystal placement panel appears. It works out how your blank sits in the machine’s engravable volume and gives you the corner piece angle and the corner piece rule reading to set, alongside the blank and engravable dimensions. The 35 mm mark on that rule is the baseline, where a blank’s corner meets the corner of the engravable area. It also warns you when a blank overhangs the corner piece — which is fine, the engraving still fits — and when the engraving itself is larger than the engravable area and would be cut off, which is not. A crystal ball is the exception: its kit holds the ball centred, so there is no corner piece to set at all.
xTool export calibration. Reachable from Advanced options in the top bar, or from the Calibration… link inside the export dialog. These settings describe your machine, jig and material rather than this design, so you set them once and they are remembered across projects. There is a tab per blank shape, plus the settings that apply to all of them: the positioning speed, the refractive index of your material (1.5 for K9 crystal and optical glass), whether to include the placement pass and at what power, the underlay height for box and cylinder blanks, and the rest height and oil level for the crystal-ball kit. If an engraving lands too high or too low inside a ball, this is where you correct it.
The placement pass is worth understanding before you switch it off. The .xs file carries two jobs, not one: the engraving inside the blank, and an outline traced at the bed that marks the blank’s footprint on black paper, so you can stand the crystal exactly where the engraving expects it. Lower its power if the mark scorches, or turn it off to export the engraving on its own.
Time-constrained engraving. Also under Advanced options. Give it a time limit in minutes and it tunes the point spacing to the finest setting that still fits, re-running the conversion a few times in steps until it lands. If even the widest spacing cannot meet your limit it says so, with the points and the time it would actually take, rather than quietly overrunning. Useful when the machine is booked or the market stall closes at five.
One more entry under Advanced options is easy to reach for by mistake, and easy to miss when you actually want it: Export the mesh design saves the 3D geometry in your scene as PLY, GLB, STL or DXF, free of charge, named after your project. That is the design — the shapes you arranged — not the engraving file. Reach for it when you want your own geometry back out of the studio; the point-cloud export in step 8 is the one your engraver runs.