What Photo Studio is for
Photo Studio is where every LaserTools project begins. You bring in a picture — or create one from scratch with AI — then clean it up, restyle it, or repair it until it is exactly what you want to engrave. From here you can export the image, or hand it straight to Embossing Studio or Mesh Studio. For how the studios connect, see the studios overview.
1. Bring in an image
On an empty project you can drag and drop a file onto the canvas, click to browse, or paste straight from your clipboard. Supported formats are JPG, PNG, WebP, and TIFF, up to 50 MB.
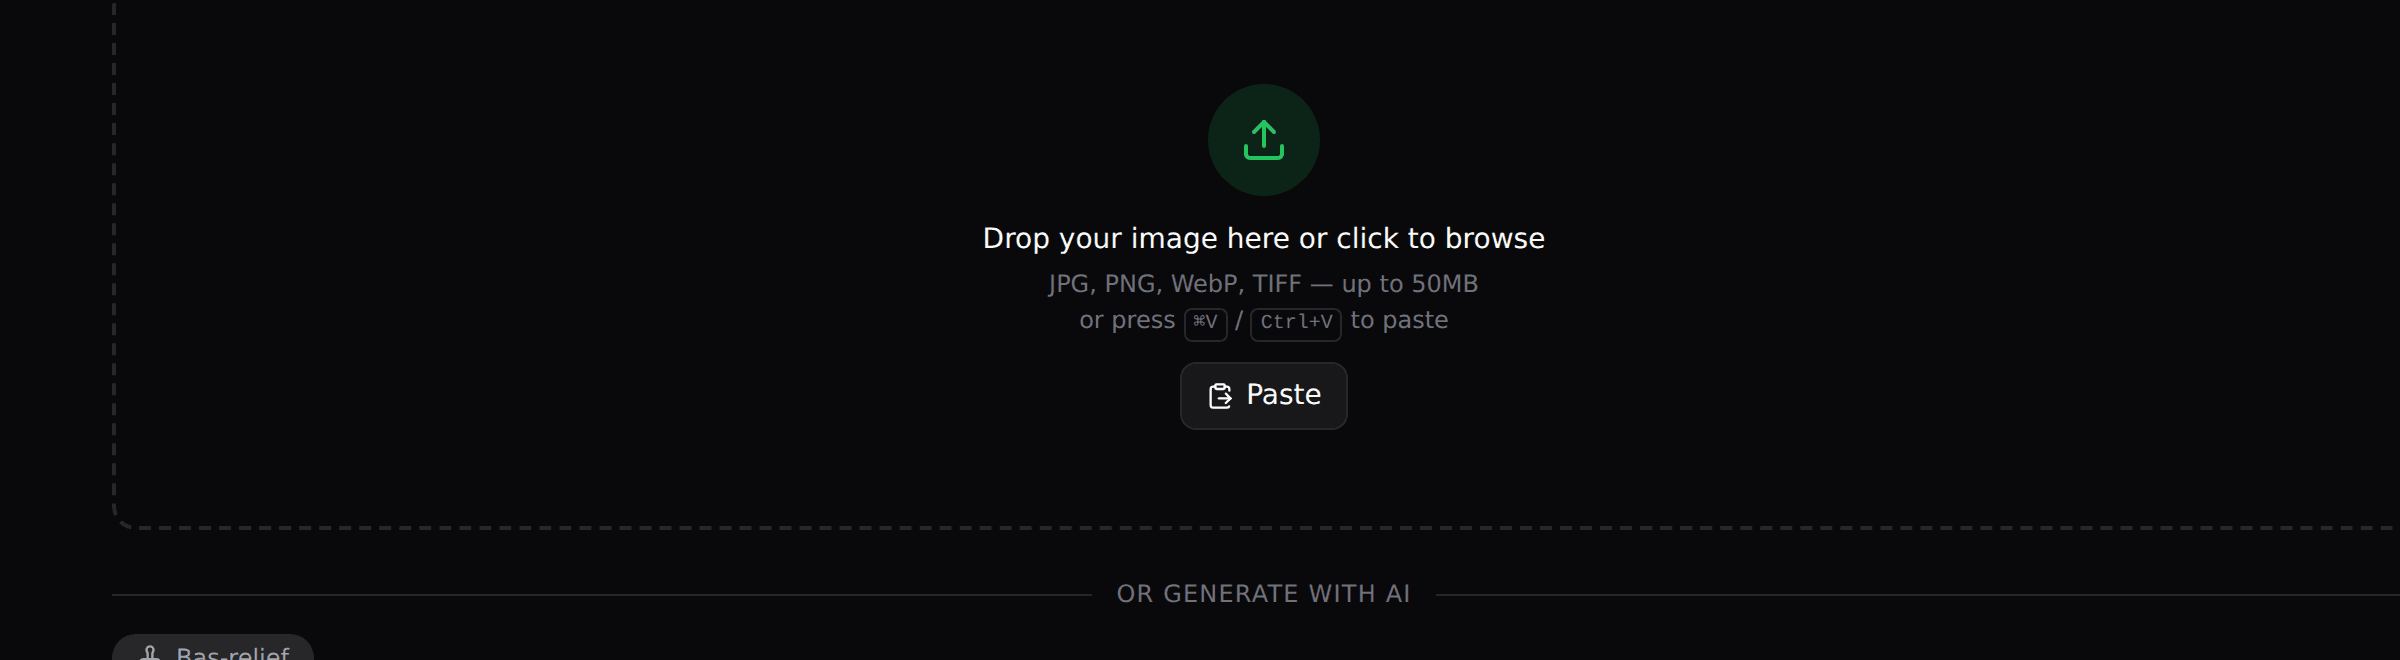
No image yet? Generate one instead, covered next.
2. Generate an image with AI
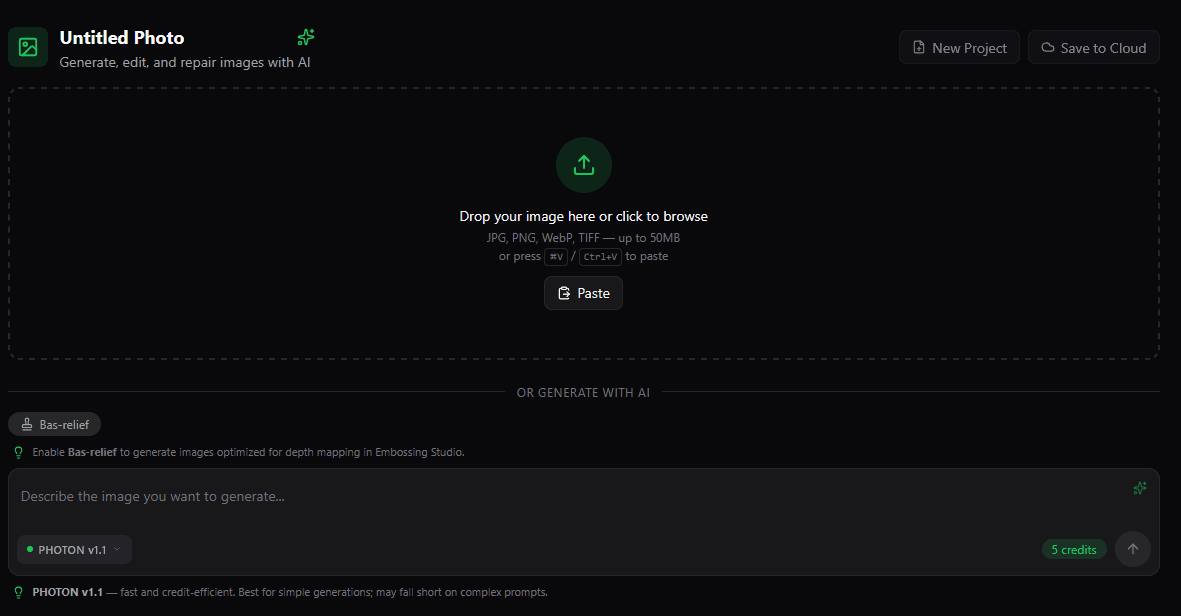
Below the upload zone, describe the image you want (up to 1,000 characters) and press Enter or the arrow button. The credit cost is always shown on the button before you commit, so nothing is charged by surprise.
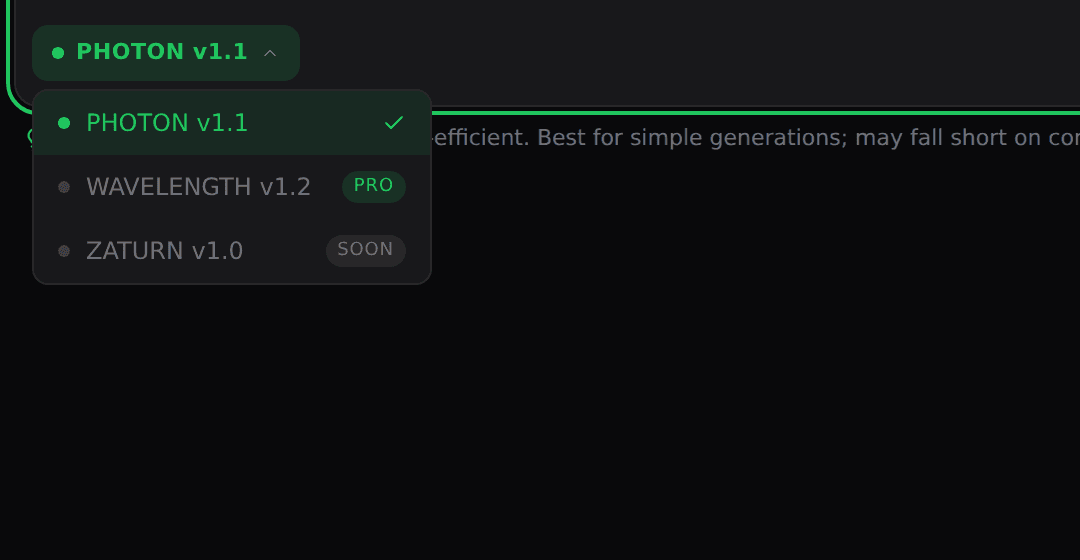
Open the model picker to choose the engine:
- PHOTON v1.1 — fast and credit-efficient; best for straightforward images.
- WAVELENGTH v1.2 — the highest-fidelity model, great for complex prompts and fine detail. It is a Pro-plan feature and adds Size (e.g. 1024×1024, 1024×1536, 1536×1024) and Quality (low / medium / high) options; higher quality costs more credits.
- ZATURN v1.0 — coming soon.
There is also a Bas-relief preset chip: turn it on to generate images optimised for depth mapping in Embossing Studio. While a generation runs you will see progress, and if it is queued you can safely close the tab — the result waits for you on the Jobs page. Here is a portrait generated with PHOTON that we will use throughout:

3. The editor at a glance
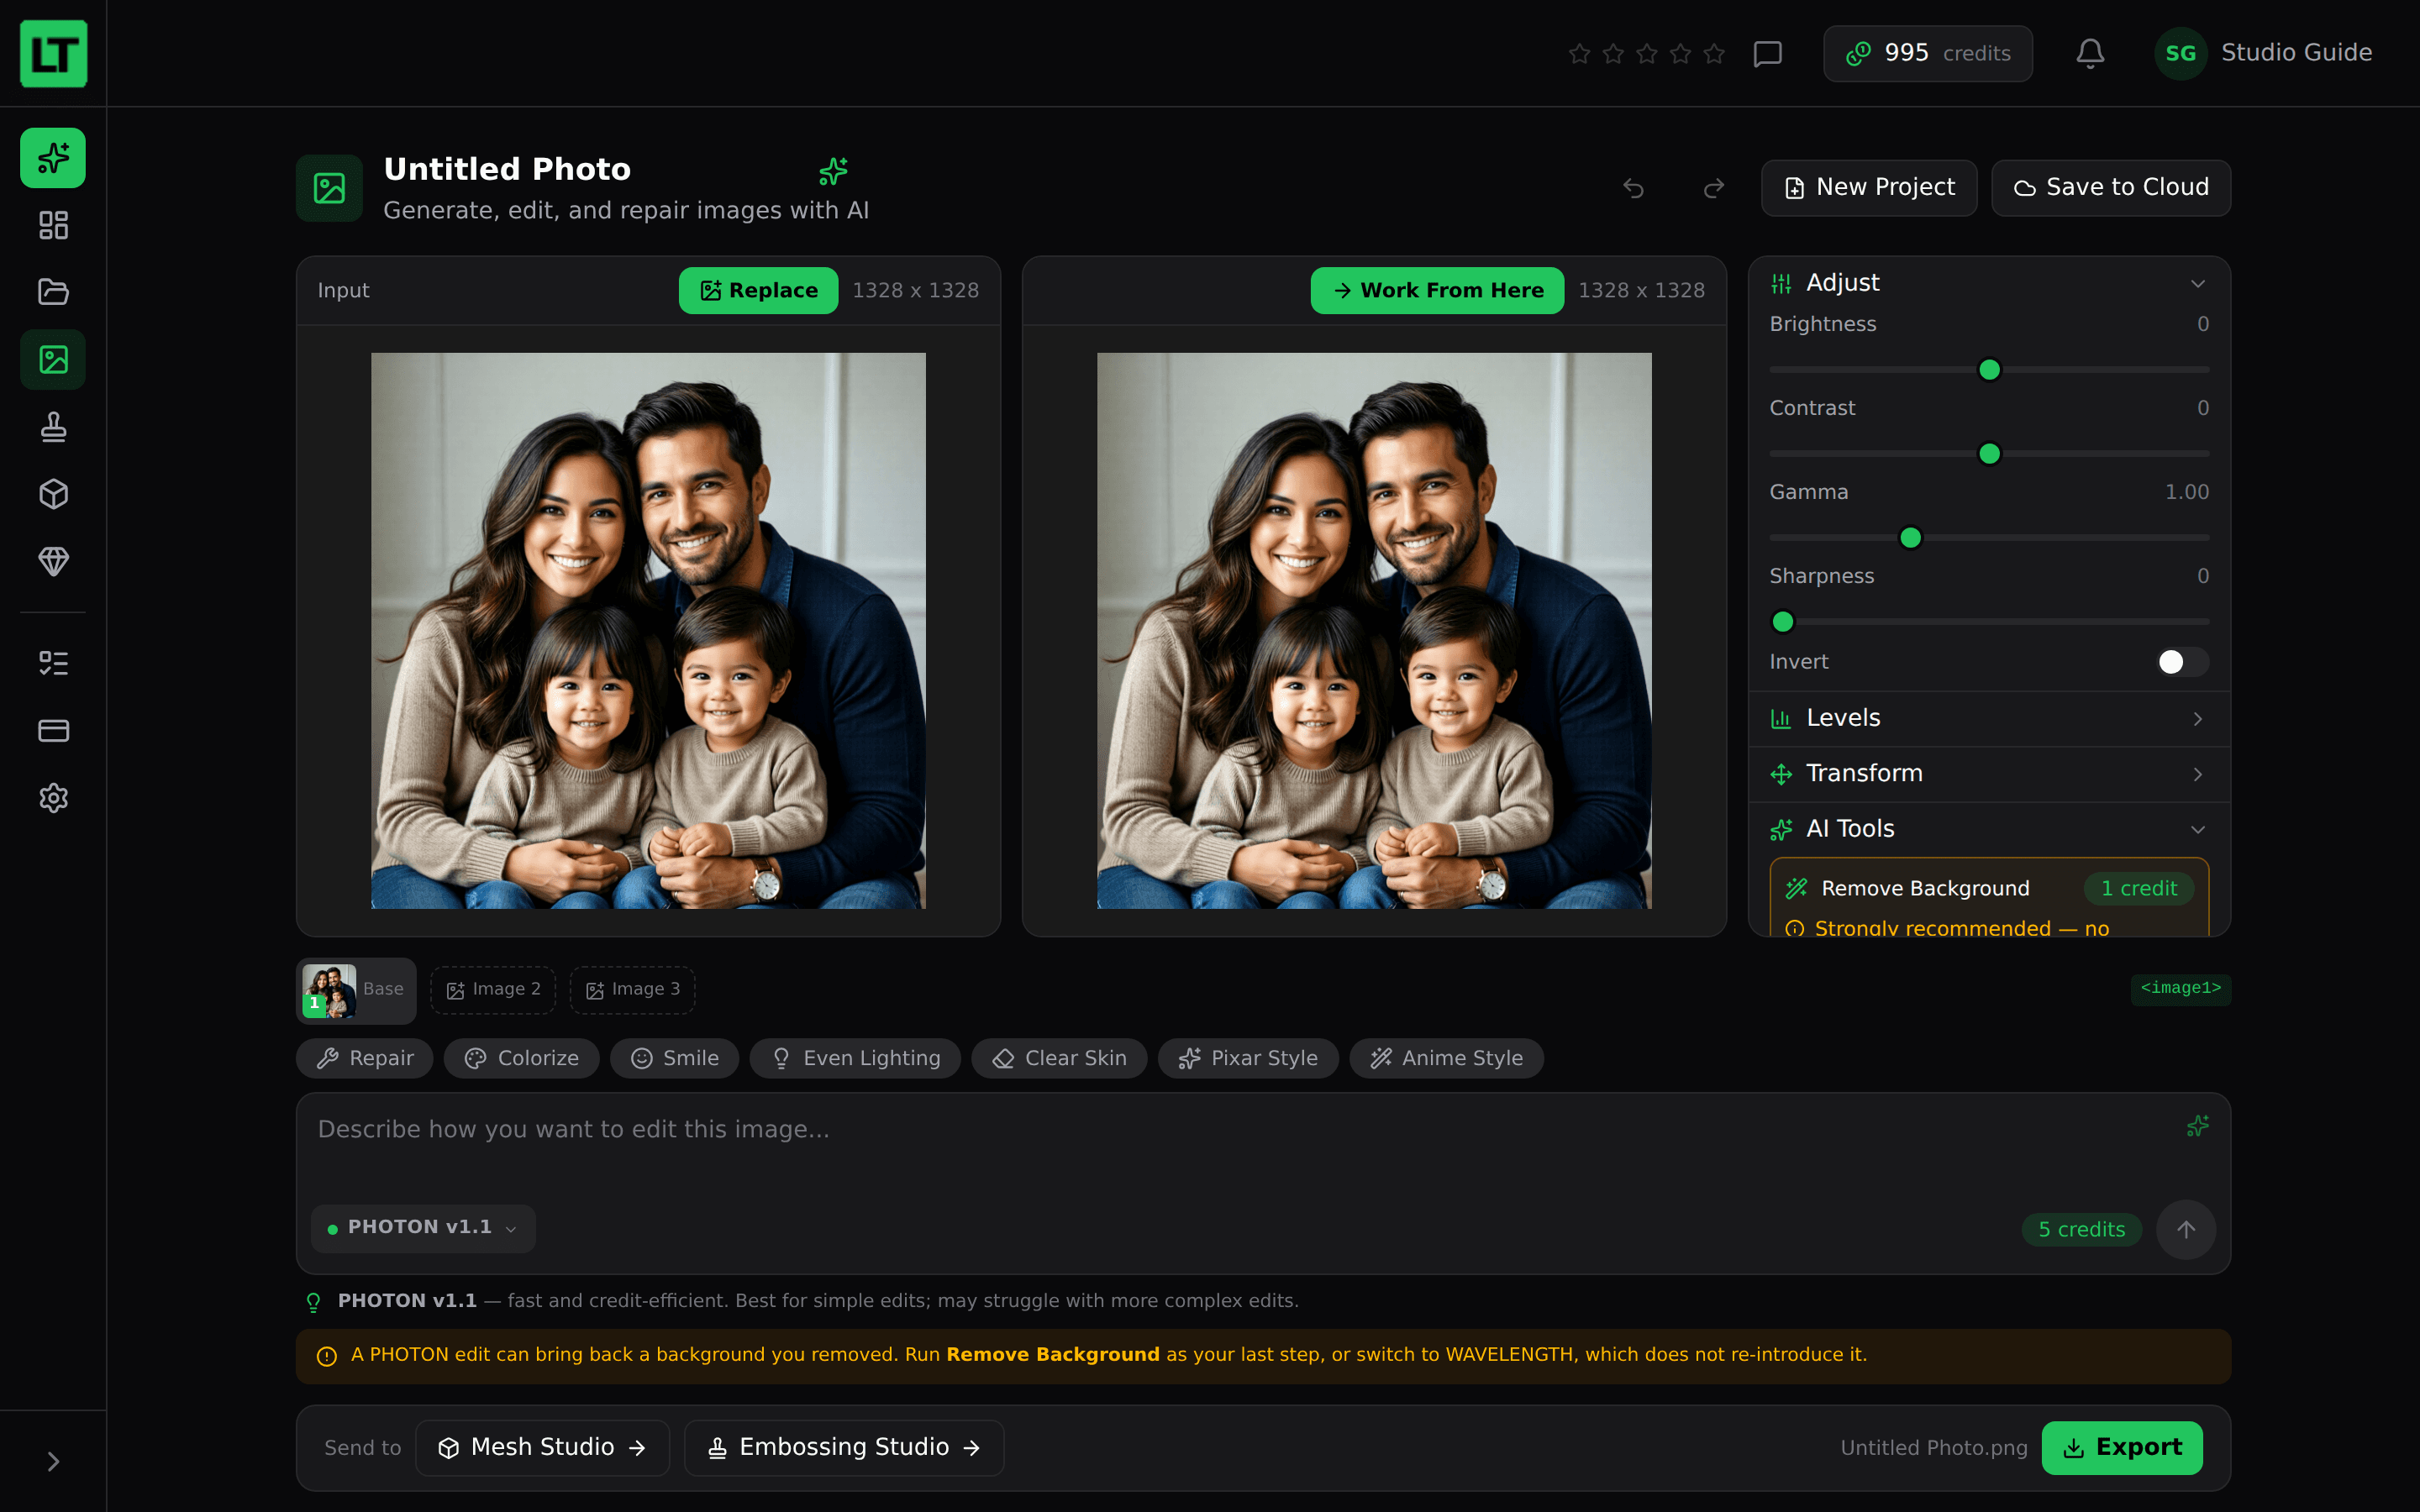
With an image loaded, the full editor appears: your Input on the left and the live Work From Here result on the right, adjustment sections down the right sidebar, an AI edit box below, and a send-to / export bar along the bottom. Work From Here bakes your current look into a fresh starting point, and the project auto-saves when you use Save to Cloud.
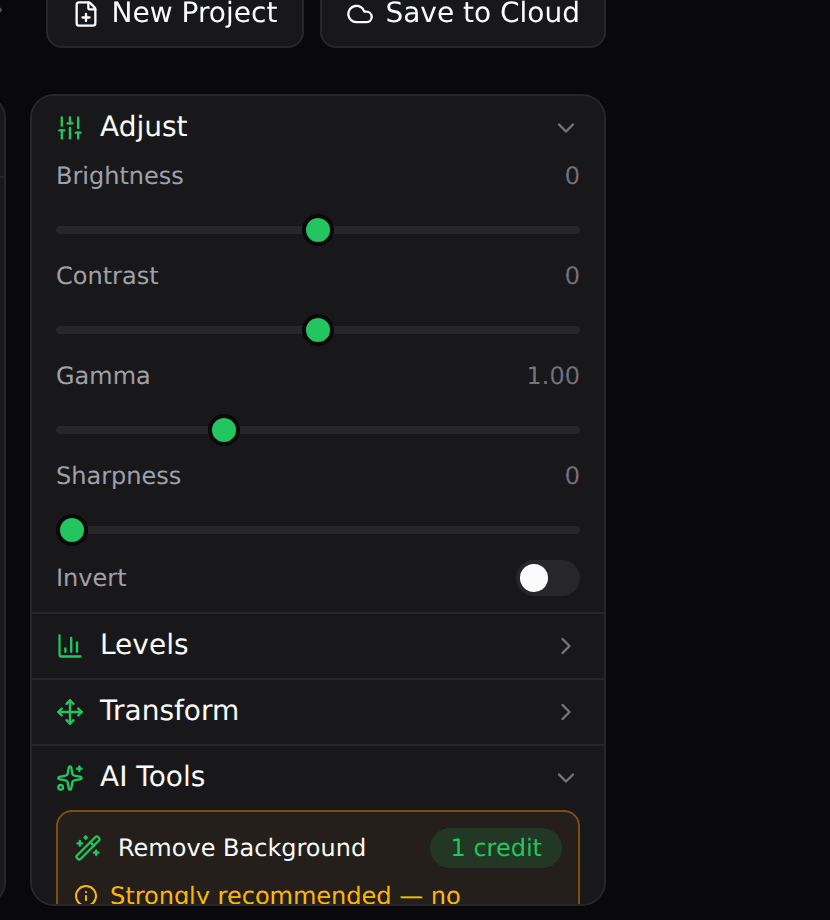
4. Adjust: tone and contrast
The Adjust section holds non-destructive sliders, each with a reset button:
- Brightness — overall lightness.
- Contrast — separation between lights and darks.
- Gamma — midtone brightness (lower deepens shadows, higher lifts them).
- Sharpness — edge crispness and apparent detail.
- Invert — flips light and dark, for negatives or effects.
5. Levels: precise tonal control
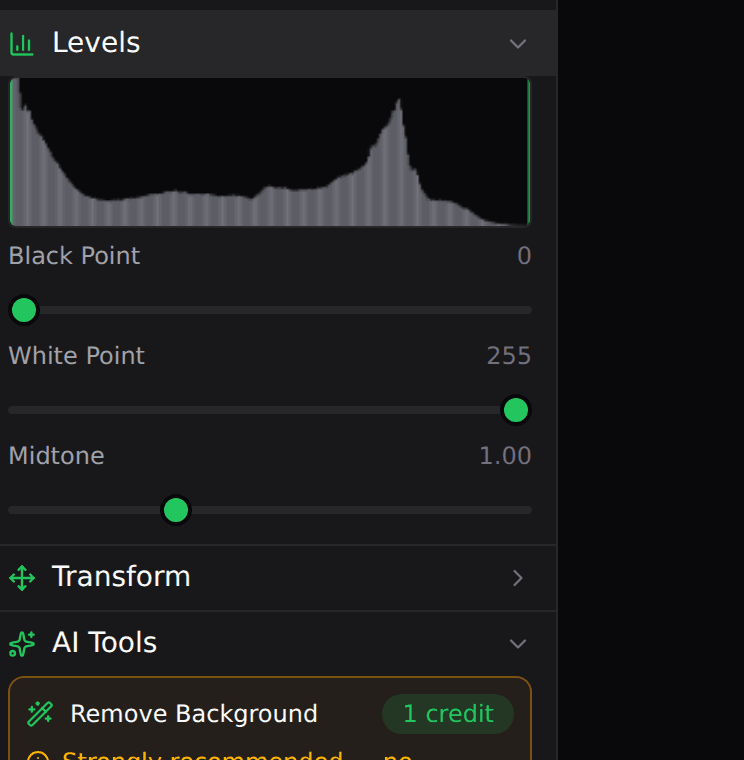
Expand Levels for a histogram and three sliders. The histogram shows how your image's brightness is distributed; the controls let you set the extremes and the midpoint precisely:
- Black Point — pixels darker than this become pure black (crushes shadows).
- White Point — pixels brighter than this become pure white (lifts highlights).
- Midtone — fine-tunes the curve between the two.
For engraving, strong, clean contrast usually reads best — Levels is the tool to get there.
6. Transform and crop
The Transform section rotates the image 90° at a time, flips it horizontally (Flip H) or vertically (Flip V), and toggles Crop.
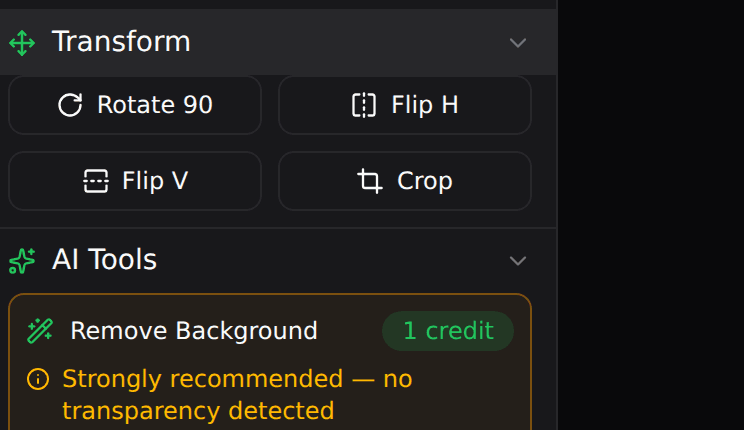
With Crop active, a marquee with corner handles appears on the image — drag to set the region, then apply (Enter) or cancel (Escape).

7. AI edit: change the image with a prompt
The edit box rewrites your current image from a description. Tap a preset chip — Repair, Colorize, Smile, Even Lighting, Clear Skin, Pixar Style, Anime Style — or type your own instruction. You can add up to two reference images and point the model at them with the <image1>, <image2>, <image3> tags. Pick PHOTON or WAVELENGTH just like generation.
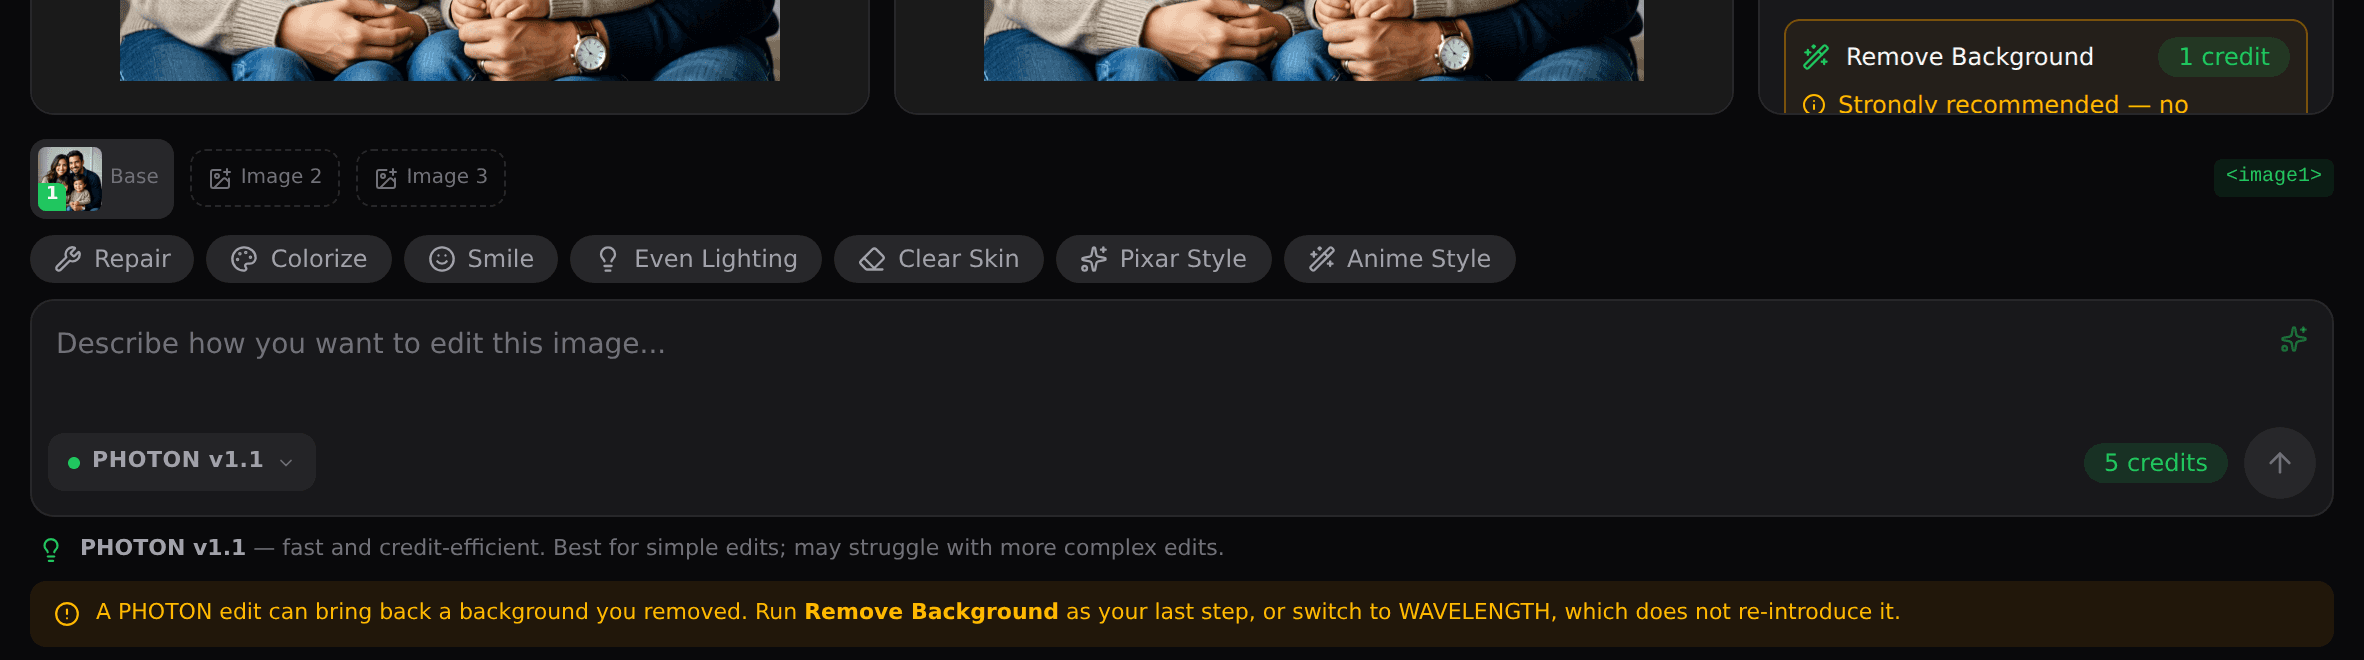
A useful tip the editor surfaces: run Remove Background as your last step, because a PHOTON edit can bring back a background you removed. WAVELENGTH does not re-introduce it.
8. AI tools: background removal and upscaling
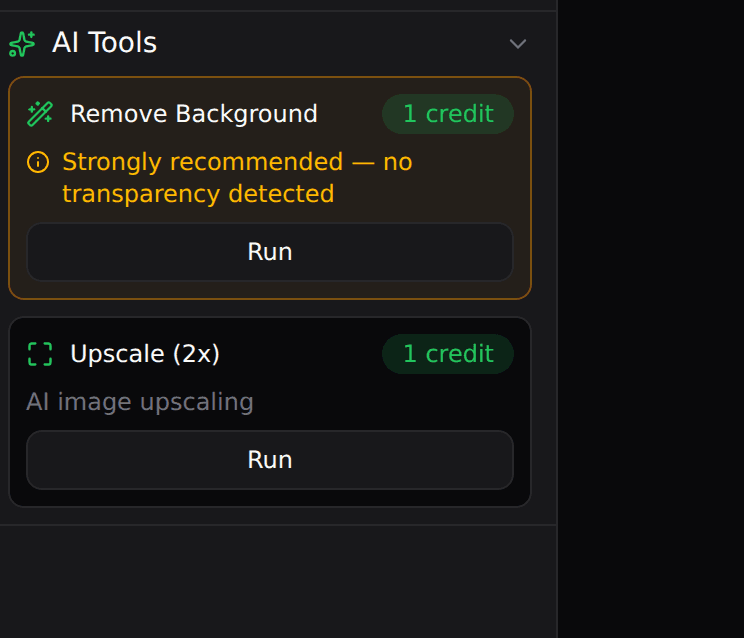
The AI Tools section has two one-click operations, each showing its credit cost and a recommendation when it would help:
- Remove Background — cleanly cuts your subject out. The app flags it as strongly recommended when no transparency is detected.
- Upscale (2×) — doubles the resolution with AI for crisper engraving on larger pieces; recommended for low-resolution images.
9. Export, or send to another studio
When the image is ready, the bottom bar lets you Export a PNG, or Send to Mesh Studio or Embossing Studio to continue a workflow without re-uploading.

Next steps: turn the image into a relief in the Embossing Studio walkthrough, or into a 3D mesh for crystal in the Mesh Studio walkthrough.